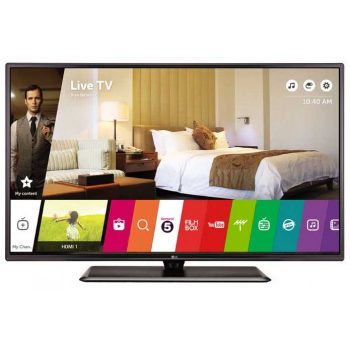
Description
Introduction
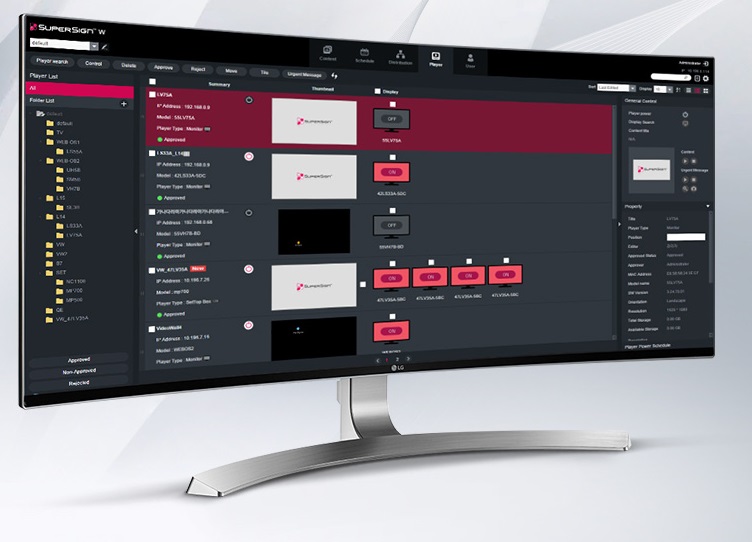
SuperSign lite is Basic signage content management software, and SuperSign W is advanced signage content management software.
Basic functions : Creating a schedule, distributing via Network and managing the player. (Supporting Video wall synchronization function – only SuperSign W)
Main Menu
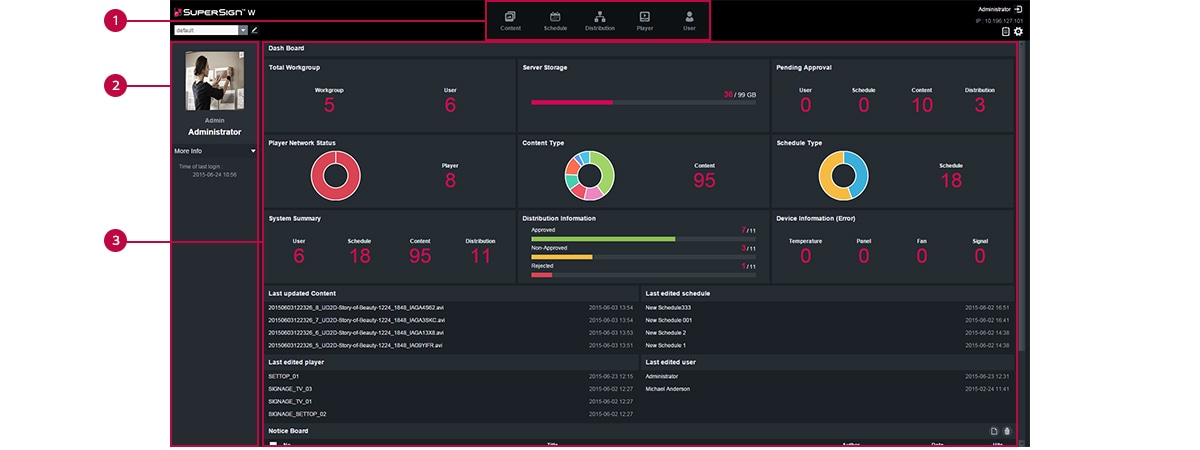
1. Menu tab
Menu tabs for key functions
2. Personal details and monitoring area
Display the user’s personal information : Including name, role and most recent login.
3. Dashboard area
– Dashboard information : goes the details page when the linked information is clicked.
– Moves the category location.
Content
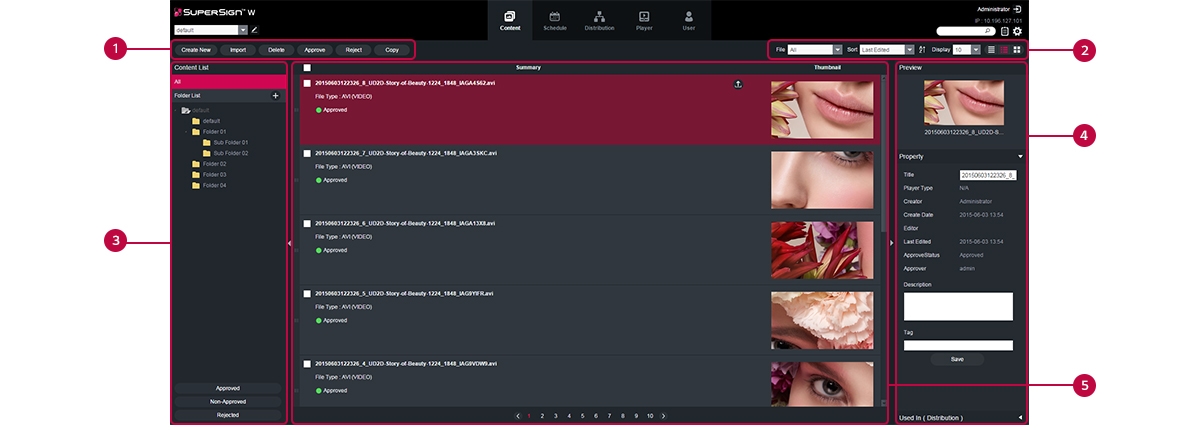
1. Action Buttons
– Create New : Create content.
– Import : Imports content and media. (video, Music, flash, image, PDF/Office)filaes or play lists.
– Delete : Delete content.
– Approve : Approve content.
– Reject : Reject Content.
– Copy : Copies or moves multiple content.
2. Sorting
– File : Sort by content create.
– Sort : Sort by various category. (e.g., Last date update)
– Sort in ascending or descending order.
– Display : set the number of items to display by pressing the ▼ button.
– List view/ Normal view/ Thumbnail view
3. Content list
Shows the list of stored content.
– All : Shows the list of all content.
– Approval : Shows the list of approved content.
– Non-Approved : Shows the list of non-approved content.
– Rejected : Shows the list of rejected content.
4. Details list
– Summary
· Displays file name, file type, player type, approval status.
· Enabled when you click the mouse.
· Switches to the content editing screen.
· Exports the content.
– Thumbnail : The thumbnail image of content.
5. Detail
Allows the user to check the content details and edit the information for the content.
– Preview : Shows a preview of the image in the content file.
– Property : Allows the user to check or edit the information entered when adding a content file.
– Used in (area) : Displays the area (schedule, player, content) in which the content is used and it details.
Player
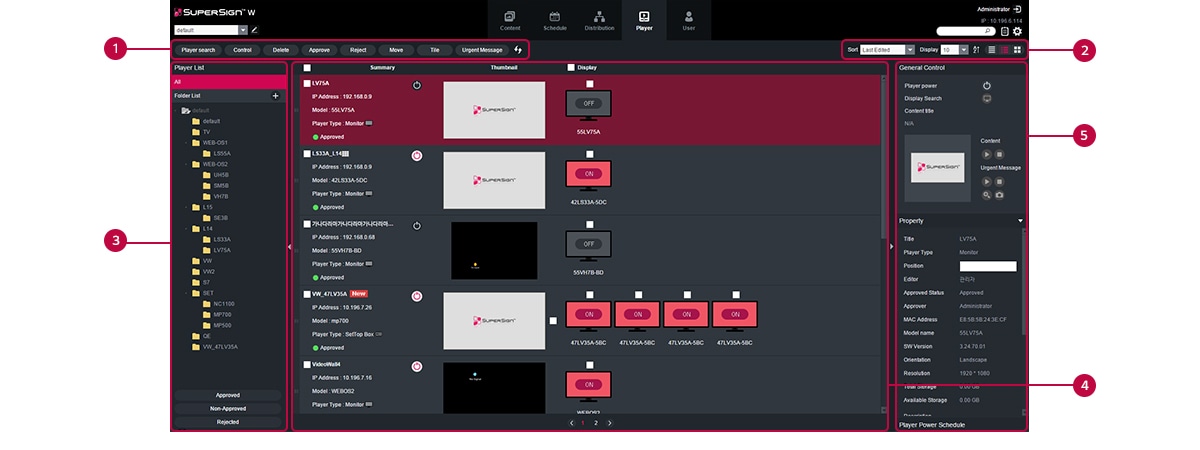
1. Action Buttons
– Player search : Search players.
– Control : Opens the Control pop-up.
– Delete : Deletes a player.
– Approve : Approves a player not approved.
– Reject : Rejects a player not approved.
– Move : Moves multiple players.
– Tile : Enables the Tile mode.
– Urgent Message : Sends an urgent message. For more information, see 77 page, “urgent Message”.
– Refresh the current display and status of the player, or browse a new player.
2. Sorting
– Sort : Sort by various category. (e.g., Last date update)
– Sort in ascending or descending order.
– Display : set the number of items to display by pressing the ▼ button.
– List view/ Normal view/ Thumbnail view
3. Player list
View the list of players saved.
– All : View the list of all players.
– Group : Shows the player list in a group.
– Approval : View the list of approved players.
– Non-Approved : View the list of non-approved players.
– Rejected : View the list of rejected players.
4. Details list
– Summary
· Displays player name, IP address, model name, player type and approval status.
· Player Power (On/Off) buttons.
– Thumbnail
· Title and display of the content currently being played.
· List of display (up to 225 items) connected to and recognized in the player.
5. Detail
Provides the player details and control functions.
– General Control : Power management, content preview/enlarged view and capture and management of playing content and urgent message play.
– Property : Player properties (Title, Player Type, Location, Modified By, Approval Status, Approved By, Serial Number, Model Name, Software Version, Display Orientation, Resolution, CPU, Total Space, Available space, Descriptions, Tags and The person in charge, Contact Information)
– Player Power Schedule : Schedule the time to power players on/off (Supported only by the SetTop Box Type player)
* Properties can be edited by the Administrator.
Schedule

1. Action Buttons
– Create New : Create a schedule .
– Import : Loads a schedule.
· Supports two file formats : XML, ZIP
· when importing the exported ZIP file, all of the included content will be registered on the same server.
– Delete : Delete a schedule .
– Approve : Approve a schedule not approved.
– Reject : Reject a schedule not approved.
– Copy : Copies or moves multiple schedules.
2. Sorting
– Sort : Sort by various category. (e.g., Last date update)
– Sort in ascending or descending order.
– Display : set the number of items to display by pressing the ▼ button.
– List view/ Normal view/ Thumbnail view
3. Schedule list
Display the list of saved schedules.
– All : View the list of all schedules.
– Approval : View the list of approved schedules.
– Non-Approved : View the list of unapproved schedules.
– Rejected : View the list of rejected schedules.
4. Details list
– Summary
· Displays file name, schedule date, player type, schedule player and approval status.
· Enabled when you click the mouse.
· Switches to the schedule editing screen.
· Exports the schedule.
· Copy schedule ( However, you can only copy schedules for the videowall schedule.)
– Thumbnail : Displays the thumbnail image and filename of a content file in a schedule.
5. Detail
Provides the player details of the selected schedule.
– Preview : Thumbnail image and file name of the content included in the schedule.
– Property : Schedule properties (the title, player type, schedule date, editor, creation date, creator, approver, description and tag)
– Available (Distribution) : Provides distribution information that uses the applicable schedule.
* The administrator can edit the information.
Distribution

1. Action Buttons
– New Distribution : Creates a new distribution.
– Delete : Deletes a distribution.
– Approve : Approves a distribution.
– Folder Approval : Approves the entire folder.
– Reject : Rejects a distribution.
– Restart sync : Restarts distribution sync.
2. Sorting
– Sort : Sort by various category. (e.g., Last date update)
– Sort in ascending or descending order.
– Display : set the number of items to display by pressing the ▼ button.
– List view/ Normal view
3. Distribution list
Shows the stored distribution list
– All : Shows all the distribution list.
– Approval : Shows approved distribution list.
– Non-Approved : Shows non-approved distribution list.
– Rejected : Shows rejected distribution list.
4. Details list
– Summary
· Displays player name, IP address, model name, player type and approval status.
· Player Power (On/Off) buttons.
– Thumbnail
· Title and display of the content currently being played.
· List of display (up to 225 items) connected to and recognized in the player.
5. Detail
Allows the user to check the information page for distribution selections and edit its information.
– Preview : Thumbnail image and file name of content to distribute
– Property : Provides the property values for the distribution (distribution file name, distribution time, distribution status)
– Player : Display the player name, IP address, model name and player type
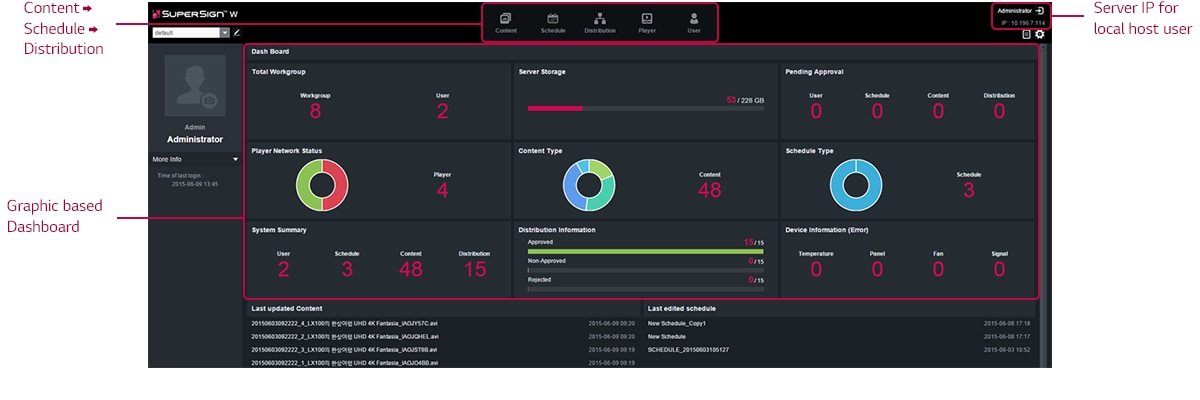
Graphic User Interface Changed
For the better readability, the new color based Interface and a graphical dashboard
For the better usage, improved feature each tab

Schedule Tab
– Auto fit the schedule timeline
Even Playback time is too short, it automatically fits to the calendar for easy editing
– Schedule Copy/Paste
For repeating of schedule Ctrl+C, Ctrl+V command support
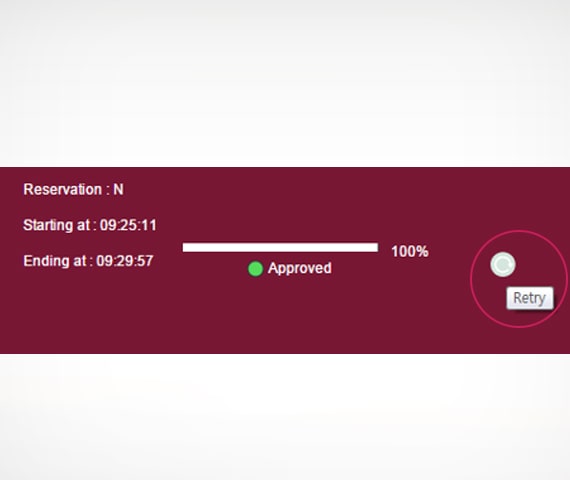
Distribution Tab
– Re-Distribution : Through retry button, easily Distribution same content
– Before : Need to start the new distribution all steps
– From now on : re-distribution by one click
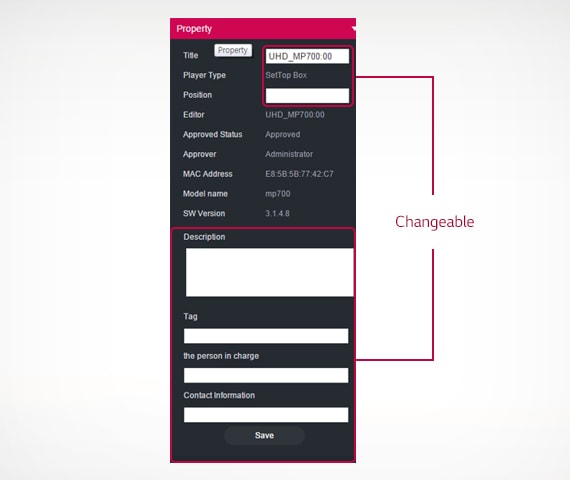
Player Tab
– Player Property Setting : Model Info. changing support on power-off status
More Unique features are included on licensed version
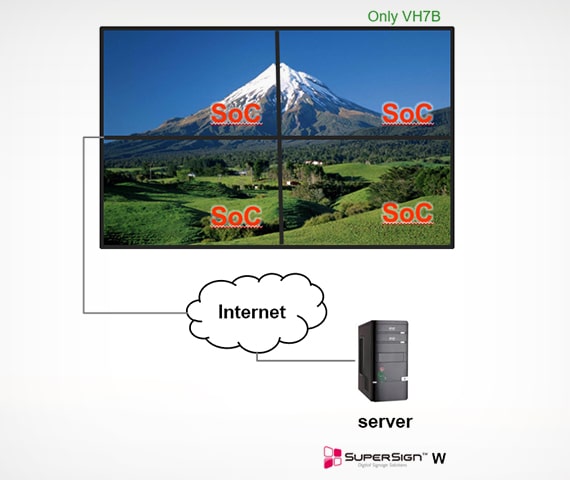
PC-Less Videowall
– SoC Sync. Distribution : PC-less videowall perfectly support on SuperSign solution
Enhanced Distribution
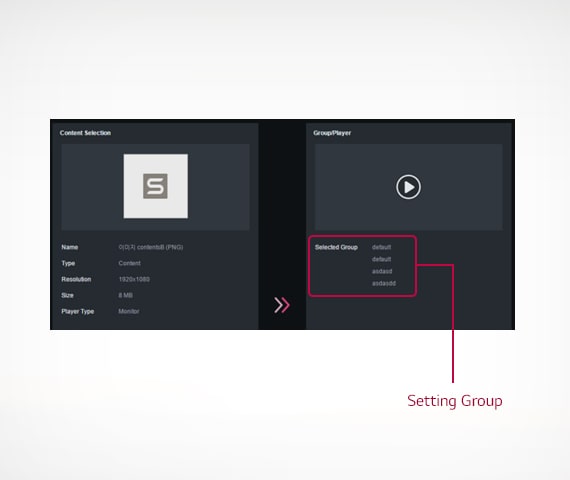
– Group Distribution : Based on each player group (or workgroup) distributes by one time
– Network failover : Whenever network failure on distribution, server supports hold and continue the distribution on the network recover

Holiday Setting
– Manual Holiday setting : Support each schedule deleting feature
Enhance features for webOS product and support UHD model
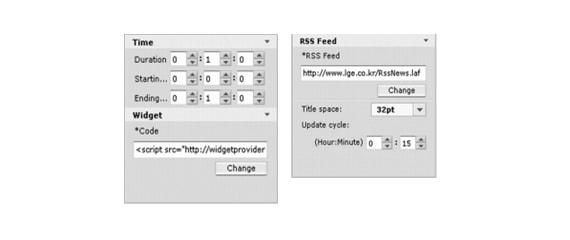
Enhanced web format
Widget, RSS Feed (webOS 2.0)
*No more needs of Media Player for using various Web content.
Enhanced Flexibility
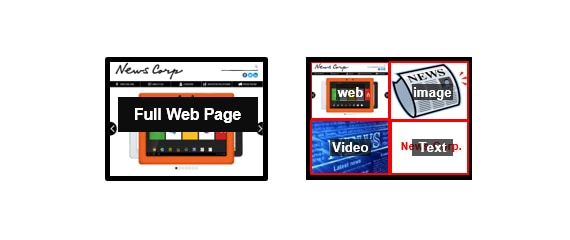
various usage support w/ web page
– Before : web Page support only 1 zone (Full Page)
– From now on : web page editing support, the size can be changed (HTML5+Video+Image)
Enhanced Converge
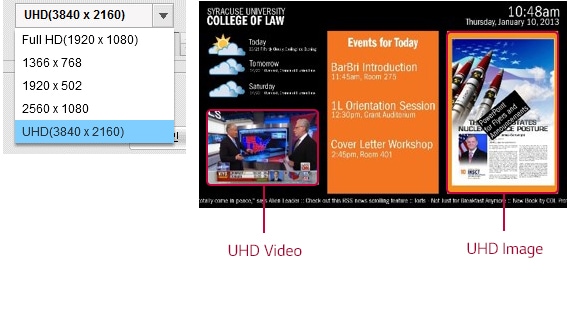
UHD Content Editing
– UHD model is covered by the editor
– UHD resolution Media is also supported
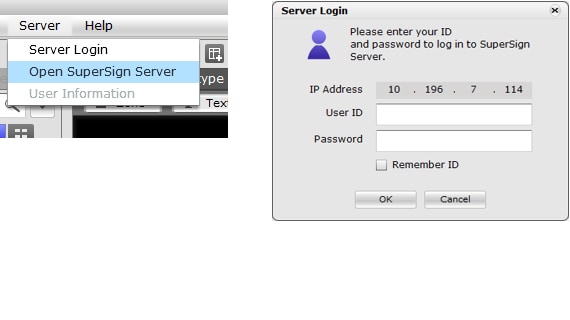
Enhanced Usability
Reduced Steps
– One step open server menu
– Server login pop up for simple connection
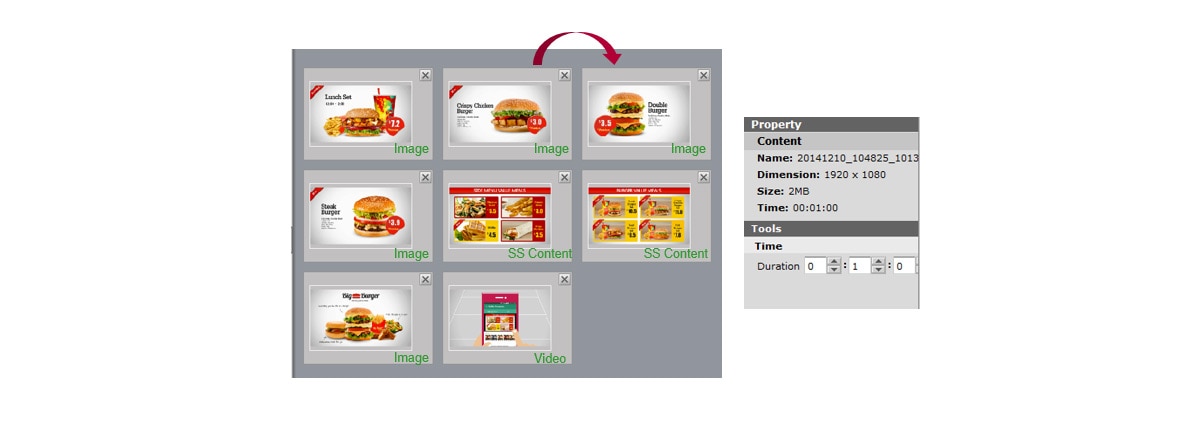
Playlist Editor
Make content package. Image, video, and even SuperSign content can be a source of playlist
– Simple drag & drop method, playlist can be created
· Input media (source) to canvas
· Re-arrange the list
– Playtime can be changed on property tab
– Example
· Image + Image + Video
· SuperSign Content (Video + Flash) + Video + Flash
· Video + Video + Office File
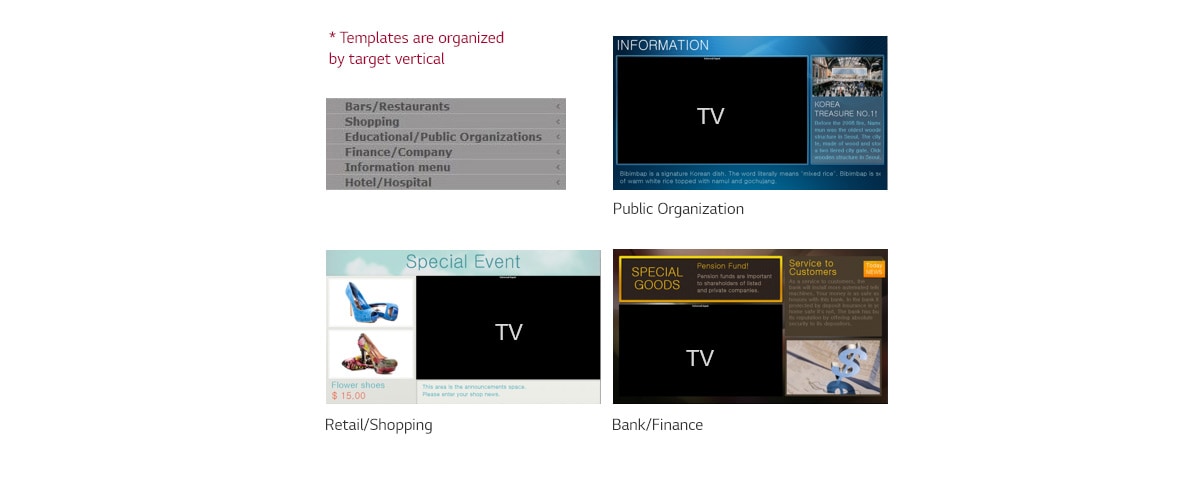
Templates
42 templates are added on 3.0 version. Some of them supports TV input area
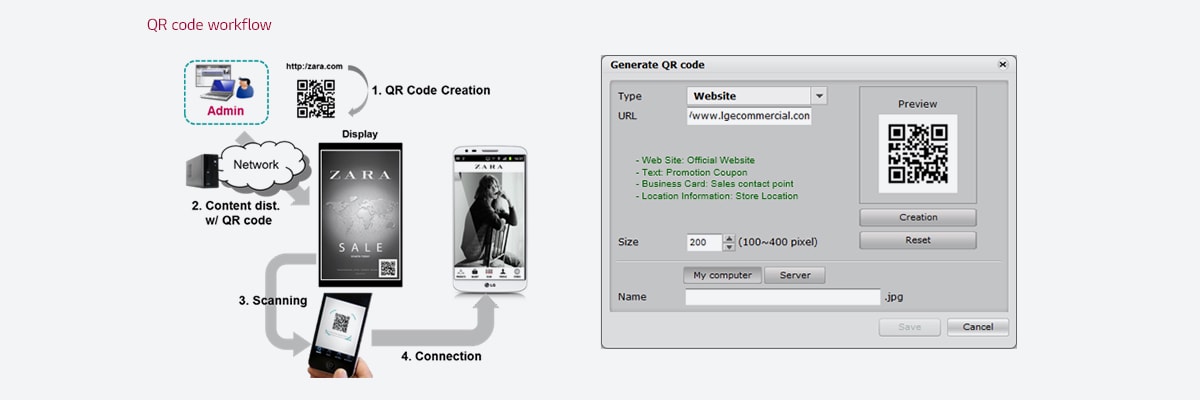
QR Code Creation Tool
QR code creator provides the more effective advertisement
Workgroup
Systematize multi-admin rules
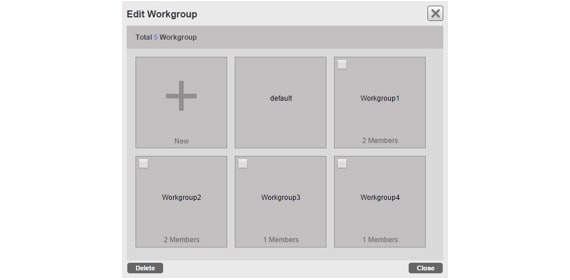
User separation function is available
Separation by customers or region
– All data is belong to workgroup (content, schedule, player, distribution)
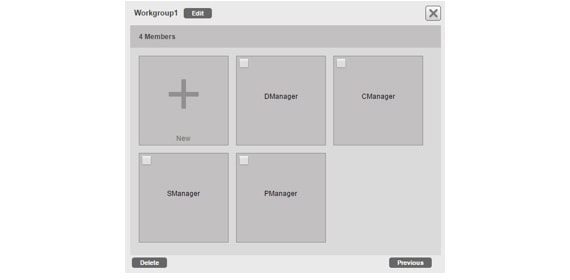
Admin can vest the approval authority
One of the member on each workgroup can be an admin
Power off Distribution
Even connected displays are powered off, the content distribution surely works through SuperSign

Distribute content & check power status
– Power on: Distribution starts immediately
– Power off: Reserve for distribution, then whenever target display powered on, distribution starts
E-mail Alert
Enhanced error monitoring feature, admin can check the error alert by the e-mail
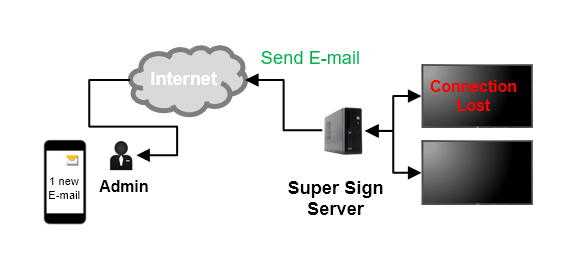
E-mail Alert workflow
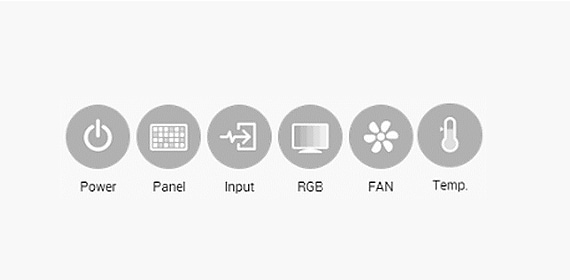
Error Check Item
Immediate Sending
Separation by customers or region
– All data is belong to workgroup (content, schedule, player, distribution)
Period Sending
One of the member on each workgroup can be an admin
Failover Setting
Remote media failover image change by SuperSign W
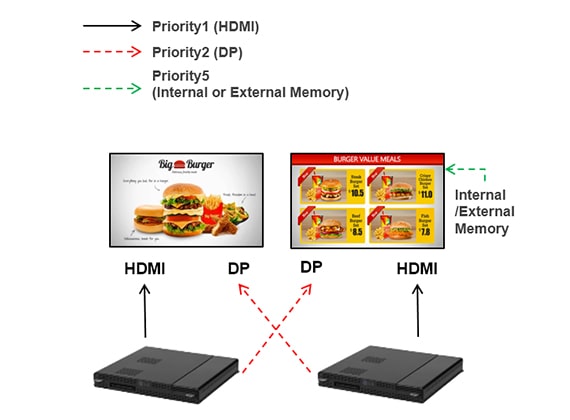
Priority of failover method
*SE3B, SE3KB (External Memory Only)
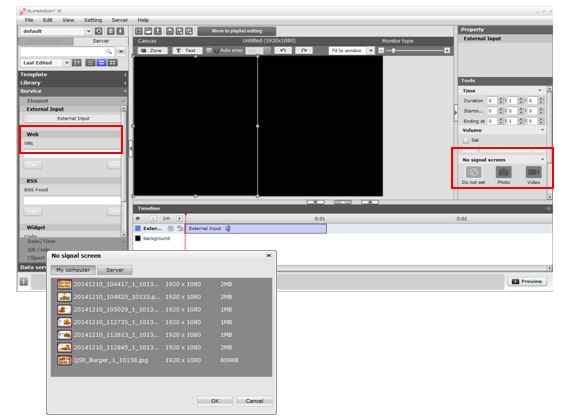
Failover media setting by the Editor
① Click External Input
② Select the failover media
③ Distribute content with it
Proof of Play
Distributed the content include variable data. New data source is coming up every session, and it depends on user set.
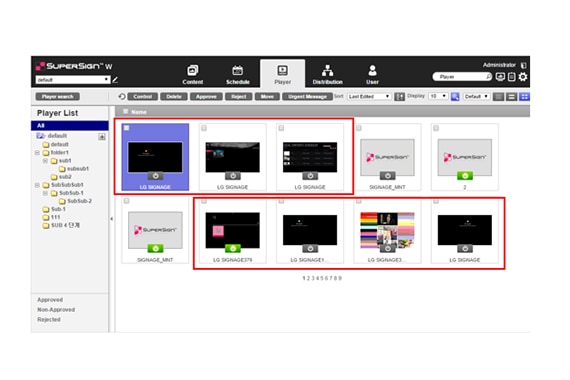
Check Screen on Server SW
Provide All connected display status at once
*only Media Player & webOS product supports
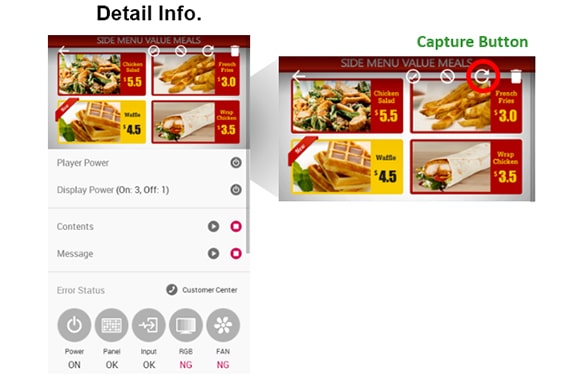
Check Screen on Mobile version
Thru the capture button, able to check each screen status.

